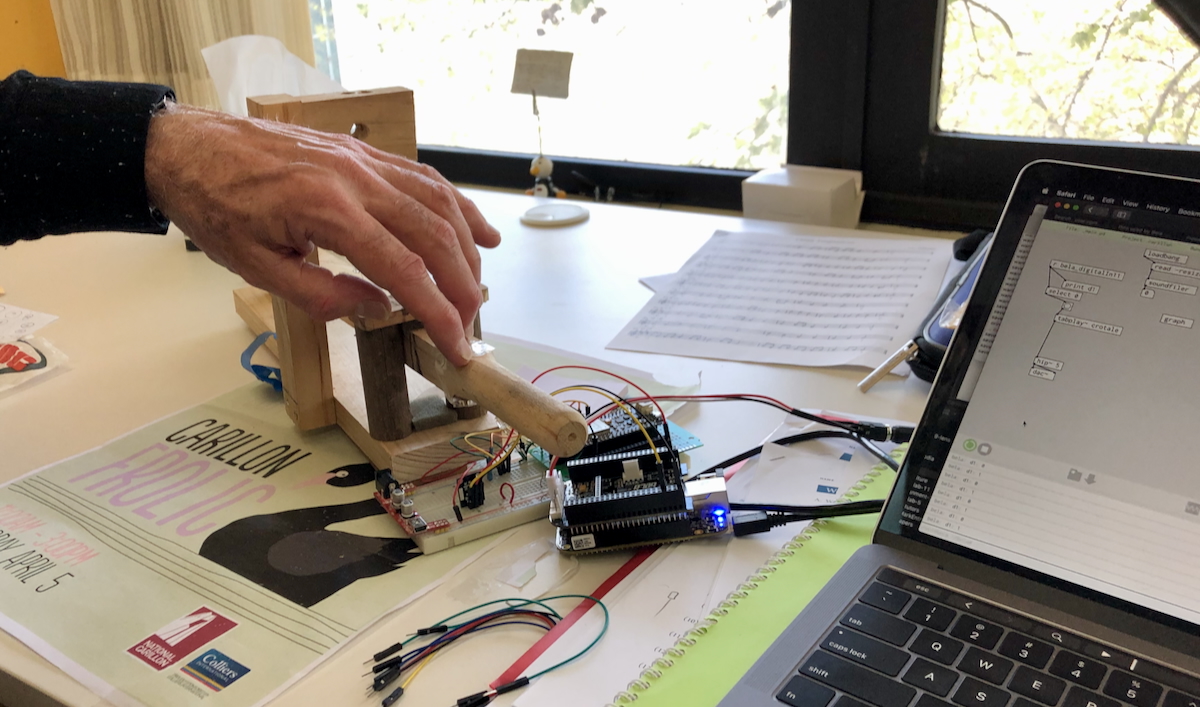
Testing a prototype electronic carillon
key (a carillon is
a big bell tower with bells controlled from a big keyboard). This
prototype was interactive, clear, evaluative and focused.
This tutorial will guide you in building prototypes that move beyond
expressing a design concept and are prepared for evaluation. We will
particularly focus on what makes a prototype testable and criteria that
you might apply to prototypes you create for your final project.
Pre-Class Tasks
Read Houde & Hill (1997)
“What do prototypes prototype?”,
Choose a user interface described in a UIST or CHI paper
Post a forum post (100–200 words) answering:
What is the system and what does it do?
Which parts of the interface are interactive? How
does the user engage with the system?
What steps/tasks did participants do in the user
study?
If you made a prototype of this interface, what would you
need to include to test it?
Include one image or sketch to illustrate the
interface (figure from paper, screenshot, or your annotated sketch
highlighting key interactive components).
N.B., for this task, make sure you choose a paper from CHI or UIST
that actually describes a novel interface. If your answer to “what is
the system” is “this paper did not introduce a system” then you did not
choose an appropriate paper!
Plan for the Class
Task 1: Understand the Concept of Testable Interactions (10m)
Task 2: Build a Testable Prototype (50 min)
Task 3: Prototype Showcase and Peer Feedback (30 min)
In-Class Tasks
Task
1: Understand the Concept of Testable Interactions (10 minutes)
In this task, you will think about what makes a prototype
testable and apply these criteria to a prototyping plan.
A prototype is testable if it lets you observe and learn from
real user interactions. Below, we have set out some criteria
for a testable prototype that we developed within the tutors. While
these criteria aren’t identical to others found in HCI literature (e.g.,
Houde &
Hill, 1997; Lim et al., 2008; Odom et
al., 2016), we feel that our criteria work for the context of
this class and the needs of our assessment.
Read through the criteria, and keep them in mind for the activity
below:
Interactive: Can users actually perform the steps
or tasks you’re trying to test? (even if simulated)
Users must be able to take action and see a response, even if it’s
simulated.
Examples: pressing a paper button triggers a screen change, dragging
a card moves it to a new location, or speaking a command triggers a
response.
Ask: “Can someone unfamiliar with this prototype actually perform
the task I want to test?”
Tip: A static sketch is not enough—the user must act on the
prototype.
Clear: Can users understand what the system is,
what to do, and how it works?
Make the system’s state and feedback obvious.
Examples: highlighting selections, showing confirmation messages, or
providing visual cues for next steps.
Ask: “Will a new user generally know what to do next without
explanation?”
Evaluative: Can you observe users, gather feedback,
or identify what works and what doesn’t?
Decide what success looks like and what errors or hesitation
mean.
Examples: did the user complete the action correctly? Did they get
confused or hesitate?
Ask: “What can I measure or observe that tells me if this
interaction is effective?”
Focused: Are you including only what’s needed to
test the intended interaction or task?
Include the elements needed to test the key task; less focus on
aesthetics or extra features.
Ask: “Does every part of this prototype help answer my testing
question, or can something be removed?”
Now, complete this activity:
In your group, look at the pre-class forum posts.
Choose the most interesting system or interface
posted by a group member.
Discuss:
Which part of the system could you prototype?
What is the key interaction?
What feedback would make it clear to users?
How could you observe success?
Would your prototype meet the four criteria
above?
Task 2: Build a
Testable Prototype (50 mins)
Now you’re going to try building a quick low-fidelity prototype that
can help test a specific problem and interaction. Your prototype can be
made with paper, click-through slides, or another super quick method of
assembling a testable prototype. In groups, your tutor will give you a
random user problem. Focus on one key
interaction.
#
Scenario
Task (Key Interaction to Prototype)
1
Cat Cafeteria: Patrons interact with digital
feeders to dispense snacks to cats.
Prototype one interaction for choosing a cat and
triggering a response from the feeder.
2
Alien Plant Gardener: Manage a garden of alien
plants.
Prototype one interaction for taking an action that
affects the plant’s state.
3
Ghostly Museum Guide: Friendly ghosts guide
visitors via AR projections.
Prototype one interaction for a visitor to
communicate or elicit a response from the ghost.
4
Intergalactic Grocery Store: Shopping in zero
gravity with floating items.
Prototype one interaction for selecting or moving a
floating item.
5
Robo-Barista: Robot makes drinks based on user
input.
Prototype one interaction for specifying or
changing a drink order.
6
Secret Spy Office: Hide/reveal documents using a
smart desk.
Prototype one interaction for revealing or moving a
confidential file.
7
Pet Translator: Device translates pet sounds into
messages.
Prototype one interaction for capturing a pet
signal and generating a readable output.
Prototype one interaction for creating an effect
based on user input.
Here’s the activity:
In your group, identify the key interaction you
want to focus on testing.
Sketch and build a testable prototype based on that
key interaction.
Build your prototype!
Assess whether your prototype is interactive,
clear, evaluative, and focused (you can use
the mapping table below to help structure your responses). If it isn’t,
change it until it is!
A few prototyping notes:
Focus only on the essential elements needed to test the
interaction — do not worry about polish or aesthetics.
Materials can include paper, printed screens, simple
click-through slides, or other low-fidelity tools.
Use a Wizard of Oz approach if needed to simulate
system responses (Porcheron et al., 2021).
Groups will present and demonstrate their testable
prototypes to the class, allowing peers to interact and provide
feedback. The focus is on observing real user
interactions, not just explaining how the prototype works.
Follow these steps:
Group Demo (1–2 min per group)
Introduce the scenario and user problem.
Highlight the key interaction.
Peer Interaction (2–3 min per group)
Each other group tries the interaction.
Observers record one positive observation and
one question or point of confusion about the
interaction.
Use a feedback sheet or notebook to capture
responses.
Group Reflection (1–2 min per group)
Each presenting group reads aloud the one positive and one
question received from peers.
Discuss briefly how they might improve the
prototype based on this feedback.
Houde, S., & Hill, C. (1997). What do prototypes prototype? In M. G.
Helander, T. K. Landauer, & P. V. Prabhu (Eds.), Handbook of
human-computer interaction (pp. 367–381). North-Holland. https://doi.org/10.1016/B978-044481862-1.50082-0
Lim, Y.-K., Stolterman, E., & Tenenberg, J. (2008). The anatomy of
prototypes: Prototypes as filters, prototypes as manifestations of
design ideas. ACM Trans. Comput.-Hum. Interact.,
15(2). https://doi.org/10.1145/1375761.1375762
Odom, W., Wakkary, R., Lim, Y., Desjardins, A., Hengeveld, B., &
Banks, R. (2016). From research prototype to research product.
Proceedings of the 2016 CHI Conference on Human Factors in Computing
Systems, 2549–2561. https://doi.org/10.1145/2858036.2858447
Porcheron, M., Fischer, J. E., & Reeves, S. (2021). Pulling back the
curtain on the wizards of oz. Proc. ACM Hum.-Comput. Interact.,
4(CSCW3). https://doi.org/10.1145/3432942